This is how the input tags looks like.
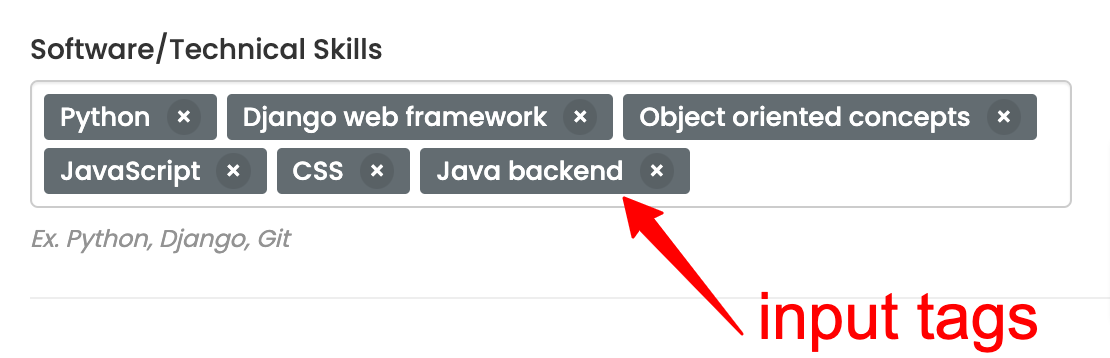
Above screenshot is from the CSEstack CV builder where we are using input tags in Django form to allow users to submit their skills.
Do you want to add this kind of input tags in your Django app form?
I will explain it step by step.
You can also watch this video.
,, input string gets converted into the tag.x, you can also delete the specific input tag.Creating input tags is simple. If you are using bootstrap and jQuery plugin, you don’t have to write even single line of code.
Follow the steps given below.
There are lot of plugins or code snippet available to create input tags. After trying many, I found one that works seamlessly.
It contains following files.
inde.html – This is sample file to demonstrate.LICENSE – describe the license used for this package.package.json – Information related to the plugin package.README.md – Read me files.tagsinput.css – style sheettagsinput.js – JavaScript fileHere we only need last two files (tagsinout.css and tagsinput.js). These two are the actual files and all other are supporting files.
This plugin comes with the MIT licences. That means it is free to use in your application.
The best way to keep all the CSS, JavaScript and plugins is into the static directory.
tagsinout.css and tagsinput.js files into the new folder.If you are not clear about the directory strture, watch the video. I have demonstrated it.
Run below command.
python manage.py collectstatic
This command will copy all the static files into the executable directory.
First of all you have to create Django form.
Define the Django model field. Make sure you define it as charField() as below.
skills = models.CharField(max_length=200, default="", null=True, blank=True)
Inside your Django HTML page, add below line of code to add the input field.
{% render_field form.skills class="form-control" id="input-skill" data-role="tagsinput" %}
Make sure you add data-role="tagsinput". If you don’t add it, your input tags will not work.
For the sake of this example, we are using form.skills Django form field. Based on your project demand, you can use any other model and form field name.
In your HTML file, insert CSS and JS script. This is how the code looks like.
<link rel="stylesheet" type="text/css" href="{% static 'plugins/tags-input/tagsinput.css' %}" />

<script src="{% static 'plugins/tags-input/tagsinput.js' %}"></script>
That is all.
Start your Django application.
python manage.py runserver
Once started, open the Django form. You will see input tags working like a charm.
Wow! You done it.
Let me know how do you find this tricks in the comment section below 😀

I am a Python enthusiast who loves Linux and Vim. I hold a Master of Computer Science degree from NIT Trichy and have 10 years of experience in the IT industry, focusing on the Software Development Lifecycle from Requirements Gathering, Design, Development to Deployment. I have worked at IBM, Ericsson, and NetApp, and I share my knowledge on CSEstack.org.