It is a web-based interactive computational environment for creating Jupyter notebook documents. It supports several programming languages like Python (IPython), Julia, R, etc.
This software tool is widely used for data analysis, data visualization, and further interactive, exploratory computing purpose.
Follow this tutorial if you want to install and run Jupyter on your mac book.
The first thing is you have to install the Jupyter notebook on your MacBook.
To manage and install any software, macOS has a Homebrew software package management system. It is free and open-source to use. It oversimplifies the installation process of software on Apple’s operating system, macOS.
Open “Terminal” from the launchpad. And run the below command.
brew install jupyter
It downloads the Jupyter package and starts the installation. You can see the progress.
While installing you may see this warning…
Warning: Use jupyterlab instead of deprecated jupyter
Basically, Jupterlab is the next-generation Jupyter notebook. You can read the difference between Jupyter and JupyterLab.
Once installation is completed, execute the below command to run the Jupyter notebook.
jupyter notebook
It will open a new window in your default web browser with the below URL
http://localhost:8888/tree?
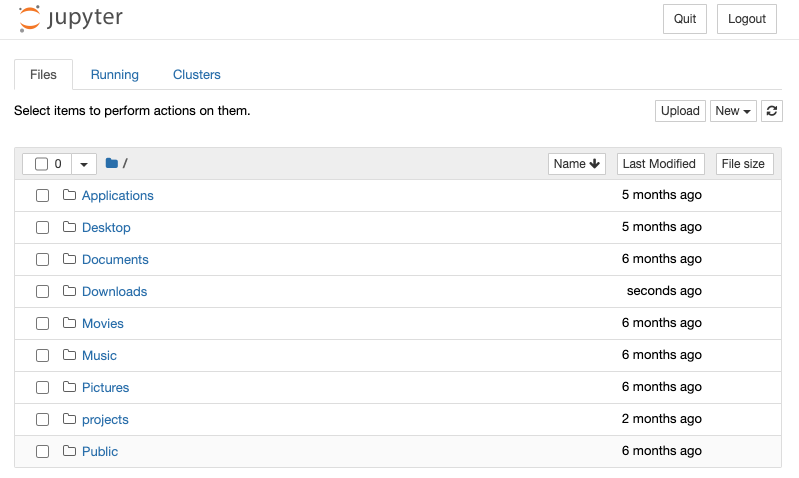
Now you can create any new notebook document or run an existing one.
Next, follow the step-by-step tutorial on how to execute the notebook in Jupyter.
If you have any difficulty setting up your notebook environment or to Install Jupyter Notebook on Mac, let me know in the comment section below.

I am a Python enthusiast who loves Linux and Vim. I hold a Master of Computer Science degree from NIT Trichy and have 10 years of experience in the IT industry, focusing on the Software Development Lifecycle from Requirements Gathering, Design, Development to Deployment. I have worked at IBM, Ericsson, and NetApp, and I share my knowledge on CSEstack.org.
 Do you want me to send you programing updates for FREE?
Subscribe below…
[newsletter_form form=”1″]