In the previous tutorial, we have learned about installing Android SDK and developing your first Android i.e. Calculator.
In this tutorial, we are going to learn Android navigation architecture components in detail. At the end of this tutorial, you will able to create an Android App with navigation. When you click on the button in the Android app, it will open a new window just as below.
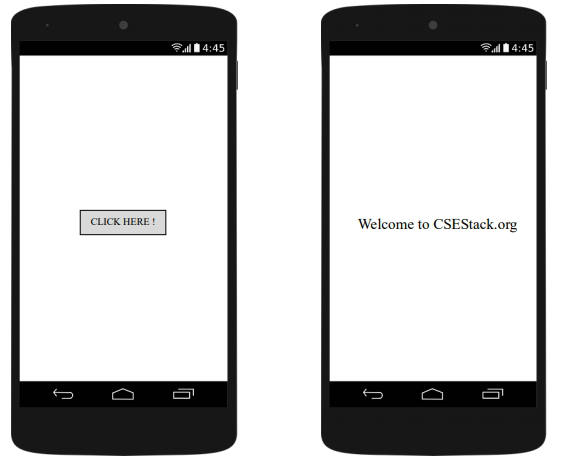
Table of Contents
What is Android navigation component?
Android Navigation Architecture is one of the finest components of Andriod JetPack.
Navigation component is a collection of libraries, a plugin and tooling that facilitates android navigation.
What is the use of Android navigation component?
Navigation allows users to navigate between different parts of content within an app. Navigation component helps you implement Options menus, Button navigation, Navigation view and Navigation drawer. It also works with Action bar, Toolbar, Collapsing toolbar etc.
You might be wondering does this navigation component of Android have any leads or not. Of course it does!
Navigation components provide a number of benefits, namely:
Now let us learn about the major key parts of Navigation Component in Android. The Navigation Component consists of three key parts, specifically.
Let us dive into the basics of the above listed key parts of Android Navigation Architecture Components.
Let’s go through an example to implement navigation for easy understanding.
Note: For this make sure you are using Android Studio 3.3 or higher and Emulator or device running API 14+. Android Studio 3.3 or higher is required for the Android Studio navigation tooling.
Let’s start with it.
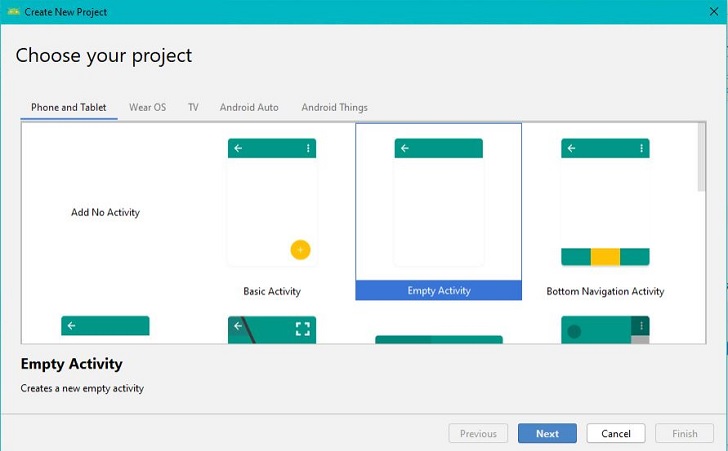
First of all, you have to make a new project to try these concepts. To create a new project for practicing Navigation architecture in Android, select Empty Activity and click Next.
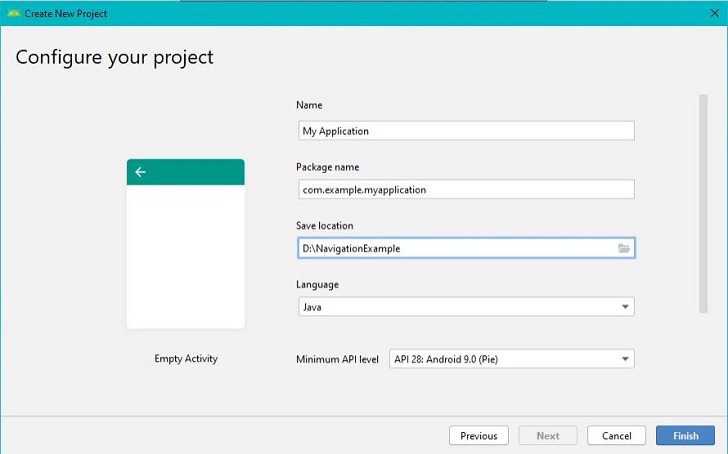
After clicking the “Next” button, configure the project by giving it a name, entering package details, and by specifying the location to save the example project in your respective systems. Click on “Finish” to complete the process.
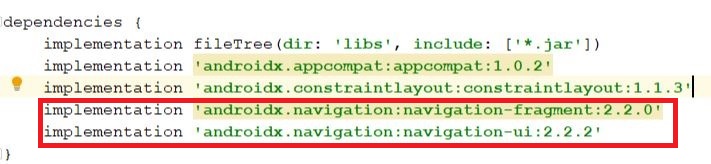
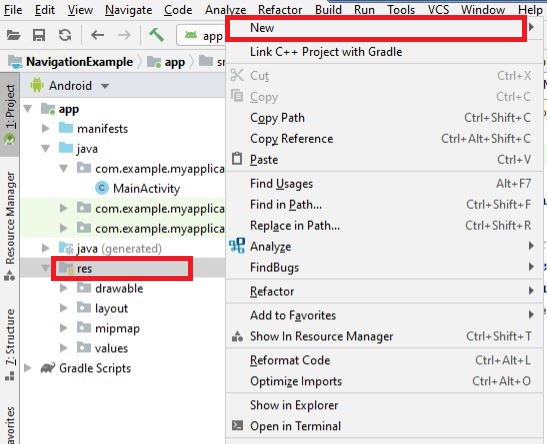
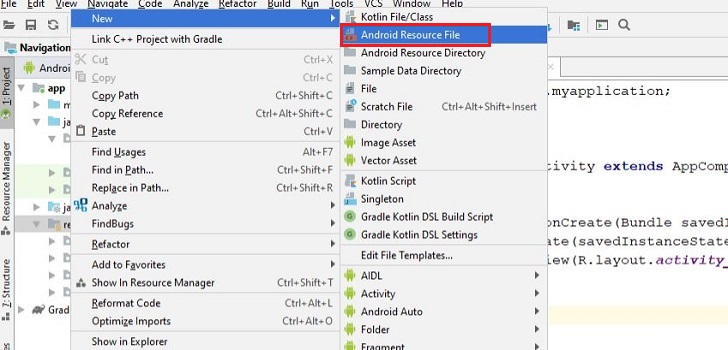
After creating a new project in Android Studio, do the following to include a navigation graph in your Android Project:
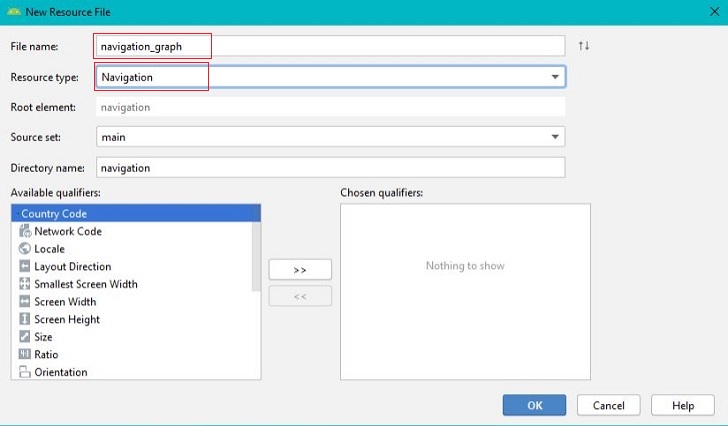
As the navigation graph resource file is created, the XML file for it looks as below:
<?xml version= 1.0  encoding= utf-8 ?>
  <navigation xmlns:android= http://schemas.android.com/apk/res/android
    xmls:app= http://schemas.android.com/apk/res-auto
    android:id= @+id/navigation_graph >
  </navigation>
So far, we have learned to create an Android Project for navigation example, then we had seen the steps to add and create a navigation graph resource file in the “res” directory of the Android Project.
Now, proceeding further lets us complete our examples by adding NavHost to it.
Go to your activity_main.xml. Switch the layout mode to design mode. A container list of Palette will be displayed on the left side. Search for NavHostFragment and drop it onto the container area of the layout and change id to nav_host_fragment.
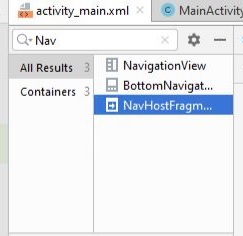
In-text mode of “activity_main.xml” layout file, your NavHostFragment will be looking like:
<fragment
    android:id= @+id/nav_host_fragment
    android:name= androidx.navigation.fragment.NavHostFragment
    android:layout_width= match_parent
    android:layout_height= match_parent
    app:defaultNavHost= true
    app:navGraph= @navigation/navigation_graph />
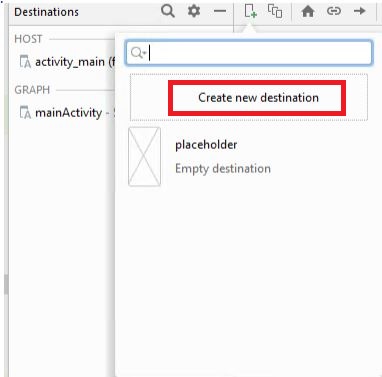
In navigation_graph, you will see that the NavHostFragment instance has been detected as the host in the top-left corner. Now to start with the navigation of components you can add fragments to the navigation graph. For this click on the new destination button which looks like a blank page with + icon on it.

Then click on Create new destination, enter your fragment name as FirstFragment in the upcoming window which asks for your fragment name. Here FirstFragment will act as start destination which will be displayed when the user launches your app.
Similarly, create another fragment and name it as SecondFragment in the same way. Suppose you have already created these fragments. Then you can add these fragments to the navigation graph by simply clicking the fragment name which will be displayed after clicking the new destination button.
Now we are going to implement navigation flow from FirstFragment to SecondFragment. Take your mouse pointer over the right-hand side vertical center of the firstFragment, a circle will appear. Click within the circle and drag the line to SecondFragment. Now you can see an arrow pointing towards SecondFragment which is called action.
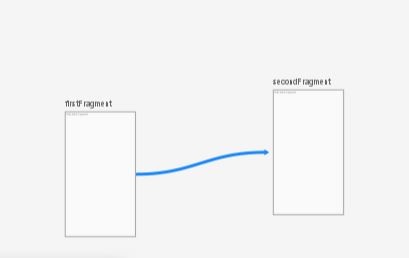
After this your navigation_graph will be looking like:
<?xml version= 1.0 encoding= utf-8 ?>
<navigation xmlns:android= http://schemas.android.com/apk/res/android
xmls:app= http://schemas.android.com/apk/res-auto
xmls:tools= http://schemas.android.com/tools
android:id= @+id/navigation_graph
app:startDestination= @id/firstFragment>
<fragment
android:id= @+id/firstFragment
android:name= com.example.navigationdemo.FirstFragment
android:label= fragment_first
tools:layout= @layout/fragment_first >
<action
android:id=@+id/action_firstFragment_to_secondFragment
app:destination=@id/secondFragment />
</fragment>
<fragment
android:id= @+id/secondFragment
android:name= com.example.navigationdemo.SecondFragment
android:label= fragment_second
tools:layout= @layout/fragment_second />
</navigation>
Add a button with id ‘next_button’ in your fragment_first.xml file. Add below code in your FirstFragment.java file:
@Override
public View  onCreateView(LayoutInflater inflater, ViewGroup
  View rootView = inflater.inflate(R.layout.fragment_first, container, false);
  Button nextButton = rootView.findViewById(R.id.next_button);
  nextButton.setOnClickListener(new View.OnClickListener ( ) {
    @Override
    public void onClick(View view) {
      Navigation.findNavController(view)
          .navigate( action_firstFragment_secondFragment);
    }
  });

  return rootView;
}
Check this line of code.
Navigation.findNavController(view).navigate( action_firstFragment_secondFragment);
The above line of code is responsible for navigating from FirstFragment to SecondFragment. Now you can launch your app. As your application is launched, a button with text CLICK HERE! will appear and as we click on the button we will navigate to the next screen which says- “Welcome to CSEStack.org”.

And that’s how Android navigation architecture components work. If you have any question, feel free to ask me in the comment.
Happy Learning!

I am a graduate in Computer science and Engineering. I have a very good knowledge in Java, android, Angular JS, Angular 5, HTML5 and Spring Boot. I used to write short stories and travelogues. With that confidence I am here to share my little knowledge. Happy learning.
 Do you want me to send you programing updates for FREE?
Subscribe below…
[newsletter_form form=”1″]
Thanks for this guide. I’m a beginner and learning Android development. I want to create my own app.