![[Adobe XD Introduction] Download and Create Your First Layout](https://www.csestack.org/wp-content/uploads/2019/09/InitialScreen_AdobeXD.png)
Do you feel interested in designing engaging user interfaces and building amazing user experiences?
Curious to know how great designs are built and deployed within websites, mobile apps, and other tech products and services?
If yes, take a look at the article and it should help you start designing your app in a great manner.
You must have heard the quote saying,
First Impression is the Last Impression.
This holds when you talk about today’s automated and tech systems.
Design nowadays is an integral part of any system. Be it a customized stand-alone software, a website or a mobile application, the design is really important.
Table of Contents
Your Design is directly proportional to user engagement.
Any product/system design defines the rate of engagement within the same. More the attractive design, more engagement rate of the user.
Along with the attractive design, the focus of design has shifted from complex to minimal and users are relying more on systems that have a minimal yet elegant design.
With the design, the functionality of the app is considered and it plays a crucial role to keep the user engaged as well, though the design decides the retainership of the user. Returning user will visit your app/website back again due to two major factors:
Considering these factors, it is extremely important for any business to make sure that the design is taken care of in a great manner.
Any design should convey a story and must be interactive in its ways and thus there are several tools through which this can be achieved.
Some of the tools to design a web, app or any software are Sketch, InVision, UX Pin, Adobe XD, Adobe Photoshop and more.
With the design, prototyping (rough demo/flow of the system) is also important. Photoshop doesn’t allow prototyping as it is more focused on image editing, creative designs whereas the other tools help define the flow of the app as well.
Here, I will be introducing the Adobe XD tool for designing.
Adobe XD is provided by Adobe Inc. It is used to design websites, mobile applications both Android and iOS, tablet app designs and other layout designs.
The tool is completely open-source and is free to use and download, provided by Adobe Inc.
To use the tool, you need to first download and install the same from their official link.
After Adobe XD introduction. let’s see the practical use of this software for developing the app and website design.
As the tool is free, it will get downloaded in your local machine (system). Post completion of the download, the application needs to be installed.
Here is an official link to download Adobe XD.
It is available for both Windows and Mac OS.
The application will be installed using the Adobe Creative Cloud. Adobe XD has paid plans as well which gives access to the cloud storage provided by Adobe to store design creatives and files.
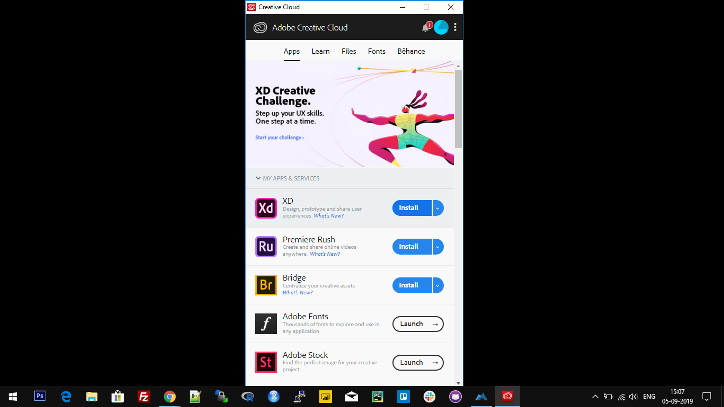
Fig.1 – Adobe XD installation using Adobe Creative Cloud
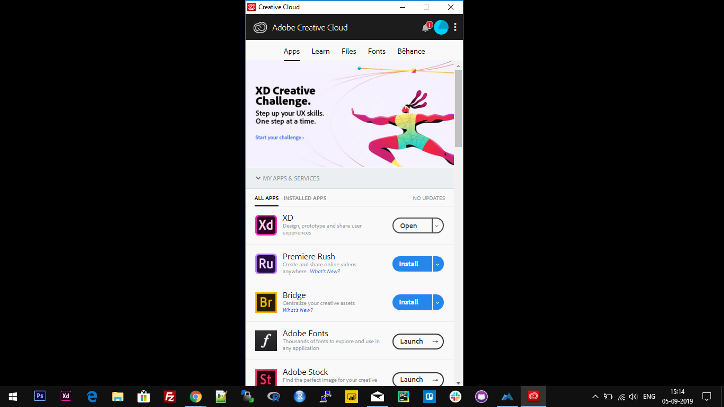
Fig. 2 – Post-installation of Adobe XD (Automatically opens a new window)
Once installed, the initial screen highlights you the usage of Adobe XD and helps you decide that you want to design.
Fig. 3 – Initial Screen after installation of the tool (First-time screen)
For initial beginners, you can view the tutorial by clicking on the “Begin Tutorial” button shown
on the initial startup screen.
For the new design, the tools will give you the following options (shown below the welcome screen saying “Start a new design”. Here only 4 designs are shown):
For all the above-mentioned platforms, dimensions are predefined. An empty blank layout is opened once you click on any of the said mentioned platforms.
For more layouts, you can click on custom size and then select the type of artboard.
Learn more about the top 10 website design tips.
Artboard means the canvas (the blank layout) where you will design your system and place all the components to build an elegant and beautiful design.
In terms of Adobe XD, you design multiple artboards (screens of a system) and place multiple components and elements within that artboard.
Once you select a custom size, there will be an icon above the magnifying glass, saying “Artboard”, on clicking the same, in the right side of the tool, multiple options to select the artboard will open up.
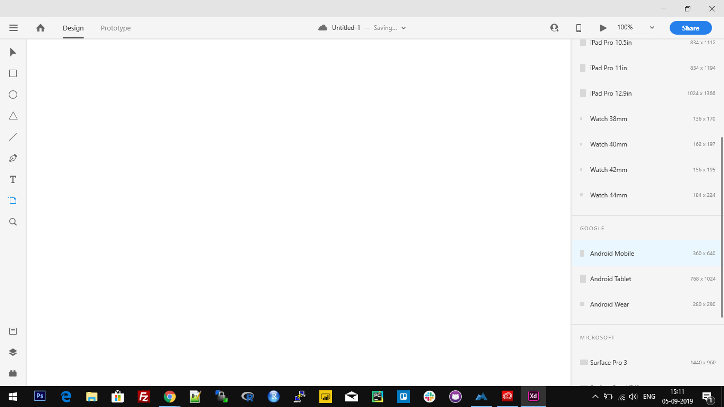
Fig. 4 – Selection of artboard (layout) depending on the design that needs to be developed.
Say, if you select the artboard as “Android Mobile (360 X 640)” the screen automatically helps
you get the dimensions right and the canvas gets opened in front of you in the tool.
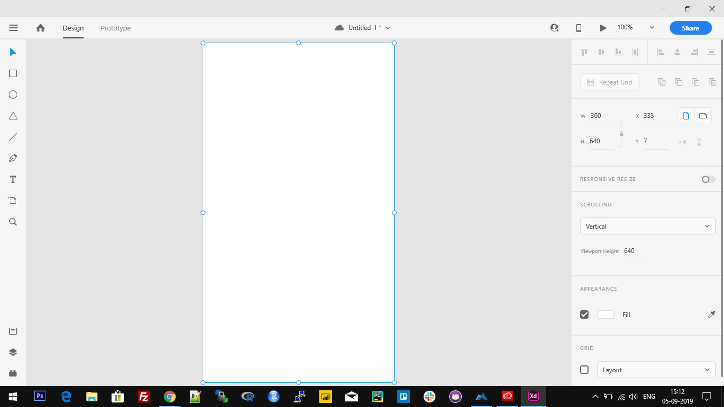
Fig. 5 – Artboard for Android Mobile (360 X 640)
When the artboard opens up, the screen has three major sections:
Also, there are multiple ready-made templates available online which can be used to design apps, websites and other related tech-based products.
There are multiple elements present in the template and the user can make use of the same and start designing the system in Adobe XD. One such source is XD Guru to download ready-to-use templates and design.
Get this tool, practice as much as you can to start with designing and improvise your skills. Till then in the next article, I’ll be going in-depth on the tool and would be talking about how application prototyping can be done to design the entire flow with animations.
Hope the article about adobe xd introduction helps you in a great manner. If it does, do share it across your network and
make sure maximum get the help reading this.
Note: You need to take care that you use only open source tools and templates while designing
any app/website/system in Adobe XD.
Happy Designing 🙂
Editor’s Note: This article is written and shared by Akshay Toshniwal.

Entrepreneur. Learner. Thinker. Blogger. A keen learner. Technology, IT, Business are the domains which excite me. A highly motivated and enthusiastic personality whose focus is to help people grow, impact lives for the betterment of everyone and build great stuff.
 Do you want me to send you programing updates for FREE?
Subscribe below…
[newsletter_form form=”1″]